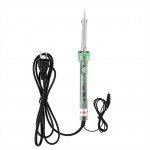
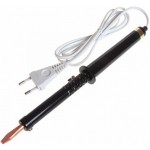
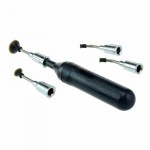
A- Soldering Iron 80W 220V with LCD B- Soldering Iron 80W 220V with LCD and on/off button black C- Soldering Iron 80W 220V with LCD and on/off button white D- Soldering Iron 80W 220V with LCD and on/off button red E- Soldering Iron 80W 220V with LCD and on/off switch black F- Thermoelement 80W for A type short wire G- Thermoelement 80W for B and C type long wire
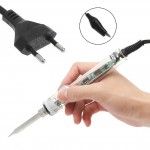
Soldering Iron 80W 220V Electric Portable Soldering Gun with LCD Indicator Hot Iron Welding High Quality Heating Tool
Features
Heat-insulated and non-slip silicone handle provides safe and comfortable operation
Heat dissipation design, comfortable hand feeling for long-term use
Tail strap line pressing design is safer for welding
LCD digital display to show the temperature clearly
Plug-pull project tip, easy to install and replace the tips
The circuit board is double-sided gold plated, safer and stabler
With fast heat-up and fast thermal recovery
Lightweight and portable
Specification
Plug Type: EU Plug
Voltage: AC220-240V 50Hz
Breakdown voltage:>1200V
Output Power: 80 W
Material: Plastic+Stainless Steel
Display: LCD
Temperature Range: 180 ~ 480°C
Type of heating: Internal heating
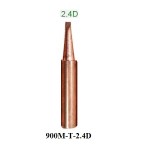
Soldering Tip: 900 M Series
How to use
Press the ''+'' button once to increase 1°C; press and hold it to increase temperature continuously.
Press the ''-'' button once to reduce 1°C; press and hold it to reduce temperature continuously.
The newly set temperature will be saved after 3 seconds, and iron will keep the temperature for next time powering-on.
When ''°F'' or ''°C'' symbol flashes, it means the heating core has not reached the set temperature.
When the heating core reach the setting temperature about 30-50s , the iron tip will reach its setting temperature.
Temperature Correction:
1. After 90 seconds of powering on, put the soldering tip on a thermometer, and a moderate amount of solder on the soldering tip; make the test point and the soldering tip have good touch (recommended soldering iron temperature is 300 ~ 350°C for correction)
2. When thermometer displays a stable temperature(about 2 ~ 3 seconds), write down the temperature.
3. Move soldering iron away from thermometer; press the ''-'' and ''+'' button at the same time to enter temperature correction interface.
4. Input adjustment quantity. Adjustment quantity= set temperature - measured temperature (see example)
5. Press the ''-'' and ''+'' at the same time to exit temperature interface, finished.
Example 1
when setting temperature is 290°C while measured temperature is 282°C, the correction steps are as follows:
a, press the ''-'' and ''+'' at the same time to enter temperature correction interface.
b, press the ''+'' button till the LCD displays 8°C
c, press the ''-'' and ''+'' at the same time to exit temperature correction interface
Example 2
when setting temperature is 290°C while measured temperature is 300 °C, the correction steps are as follows:
a, press the ''-'' and ''+'' at the same time to enter temperature correction interface.
b, press the ''-'' button till the LCD displays -10°C
c, press the ''-'' and ''+'' at the same time to exit temperature correction interface